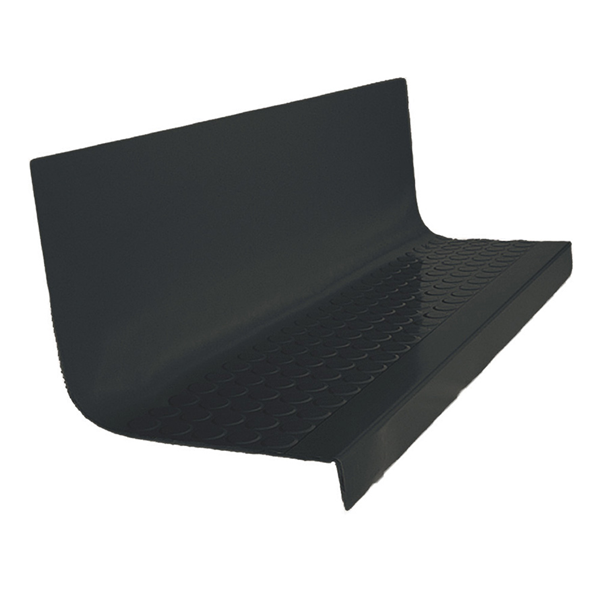
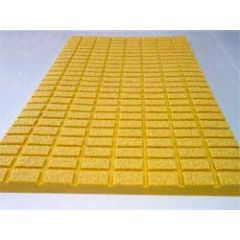
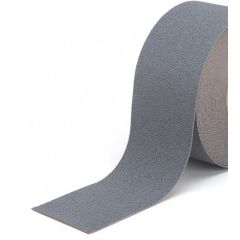
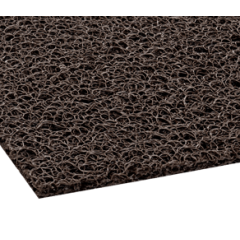
A one-piece rubber tread and riser covers the step and the face below it as a single molded part. The tread portion runs 20-7/16 inches deep, folds down over the nose, and continues as the riser without a joint anywhere in between. A raised disc field carries across the walking surface.
The reason to specify it that way is the back of the step. On a two-piece installation, the tread stops and the riser begins, and that seam sits at the exact point where everything swept off a stair collects and stays. Removing the joint removes the problem rather than managing it.
What a One-Piece Cover Does Before the Back of Every Step Turns Into a Trap
Look at the back corner of any stair covered in separate treads and risers a few years in. There is a line of grit packed into the joint. Cleaning gets it wet but rarely gets it out, and each pass drives a little more of it deeper into the seam.
That grit is doing damage while it sits there. It holds moisture against the substrate, works its way under the tread edge, and eventually starts lifting the covering from the back forward. By the time an edge is visibly loose, the adhesive along that whole rear band has usually already let go.
The seam is also where the two pieces stop agreeing with each other. Treads and risers ordered separately can arrive from different production runs, and a slight color difference that nobody noticed at installation becomes an obvious horizontal line once the stairs are lit from above.
A single molded part removes both problems by removing the joint. There is no groove for debris to pack into, no rear edge for a mop to catch, and no possibility of a color mismatch between the step and its face. Cleaning becomes one continuous pass from the nose down to the tread below. The full range of stair treads, risers and landing tiles covers both approaches, but this is the one that eliminates the seam rather than managing it.
Why One-Piece Construction and a Raised Disc, and Why This One
The tread portion is 1/4 inch nominal, which is a heavy commercial gauge rather than a light retrofit thickness. From there the riser section tapers down to 5/64 inch at its bottom edge, so the part gets thinner exactly where it meets the tread below and thickest where feet actually land.
The nose is the part worth understanding before you order. It measures 1-9/16 inches long at 3/16 inch thick, and it is both tapered and adjustable. That matters on retrofit work, where existing step noses are rarely as consistent as the drawings say and a fixed square nose either bridges a gap or sits proud of the edge.
The disc field stands 3/64 inch above the surface at 1-5/64 inches across. That is a genuine raised profile rather than a decorative texture, and on a stair it earns the height: a shoe sole compresses against a disc and gets something to push off, which is a different proposition from a shallow pattern that stops working the moment the surface is wet.
Round discs are also what makes that height tolerable underfoot. A raised rib or a directional pattern presents an edge, and edges on a stair catch toes. A disc presents the same gentle curve from every approach angle, so the profile grips without becoming something to trip over.
Abrasive inserts are available in 3/4 inch or 2 inch widths for projects that need a defined slip-resistant strip at the leading edge. That is the configuration to specify where a code review, an accessibility requirement, or a facility standard calls for visible edge marking rather than a uniformly textured surface.
Lengths run from 36 inches to 108 inches, which covers most stairwells without a butt joint mid-step. Weight works out to 2.5 pounds per linear foot, so a 72 inch piece is around 15 pounds and a single installer can handle it on a stair.
Where It Belongs, and Where It Is Not the Right Cover
Specify it on interior stairs that get real traffic and real cleaning: schools, office buildings, healthcare corridors, apartment and hotel stairwells, transit and municipal buildings. Anywhere a custodial crew is running a wet mop down a flight on a schedule, the absence of a rear seam changes the daily work.
It suits retrofit better than most stair coverings. The adjustable nose absorbs the variation you find in existing steps, the 1/4 inch tread gauge covers minor surface damage underneath, and the one-piece format means a single part per step rather than coordinating two orders in matching colors and batches.
Where it is not the right choice is a stair with a rounded or heavily worn bullnose that has lost its shape entirely. The nose adjusts within a range; it does not rebuild a step edge. Badly deformed noses want repair before any covering goes over them, or the finished stair telegraphs every flaw underneath.
It is also not the answer for an open-riser stair, where there is no face to cover and a separate tread is the only sensible part. And on a stair with an unusual depth, check the geometry before ordering, because a one-piece part is dimensionally fixed in a way that two separate pieces are not.
Three Things to Check Before You Spec It
First, measure the actual step, not the drawing. You need the tread depth from the inside of the nose, the riser height, and the existing nose projection. The part covers 20-7/16 inches from inside the nose across tread and riser combined, and that total has to reconcile with what is on site before anything is ordered.
Second, decide on abrasive inserts up front. Adding a grit strip later is not a modification you make to an installed tread, and the 3/4 inch and 2 inch widths read very differently on a finished stair. If a safety review is coming, get the requirement confirmed before the order rather than after.
Third, order the whole stairwell in one batch and add a spare. Color runs vary between production batches, and rubber that arrives six months later to replace one damaged step will sit visibly against its neighbors. One extra piece per stairwell costs a fraction of the disruption of a mismatched replacement.
Why Mats Inc.
Stair coverings get replaced when somebody trips or when an inspector writes it up, which is the worst moment to be making decisions. We have been supplying commercial stair surfaces since 1964, and the questions that actually determine whether a job goes well are boring ones: what shape are the existing noses in, how is the stairwell cleaned, and does anything about the building require a marked leading edge.
| Lengths | 36 in. to 108 in. |
| Depth | 20-7/16 in. nominal from inside of nose |
| Tread thickness | 1/4 in. nominal |
| Riser | Tapers to 5/64 in. nominal |
| Nose length | 1-9/16 in. |
| Nose thickness | 3/16 in. |
| Tapered nose | Yes |
| Adjustable nose | Yes |
| Disc profile | 3/64 in. raised; 1-5/64 in. diameter |
| Abrasive inserts | Available in 3/4 in. or 2 in. |
| Per carton | 6 |
| Weight | 2.5 lbs. per linear foot |
| Colorways | 25 total — 11 solid, 14 marbleized |
| Solid colors | Chocolate, dust, hazel, regal, mid gray, wine, charcoal, almond, pine, onyx, putty gray |
| Marbleized colors | Dusty, chestnut, hazel, onyx, charcoal, almond, cream, brick red, beryl, mid grey, harvest, lawn, marlin, violet |
| Warranty | 1-year limited (Mats Inc.); professional installation required for coverage |
Frequently Asked Questions
What does an adjustable nose actually adjust?
Answered by Dustin Thompson, Owner & CEO
The nose section is molded to flex and taper rather than arriving as a rigid fixed profile. On a retrofit that is the difference between a covering that sits tight against the step edge and one that bridges a gap you can see from the bottom of the flight.
Existing step noses are almost never uniform. Decades of traffic round them off unevenly, previous coverings leave adhesive ridges, and concrete stairs poured on site vary flight to flight. A nose with some adjustment in it absorbs that variation. What it cannot do is rebuild a nose that has lost its shape entirely, so badly damaged edges still need patching first.
How much grip does the raised disc give, and do I need the abrasive inserts?
Answered by Dustin Thompson, Owner & CEO
The discs stand 3/64 inch proud at 1-5/64 inches across, which is a real profile rather than a surface texture. A shoe compresses against it and gets purchase, and because the discs are round they present the same shape from every direction rather than an edge that catches a toe.
Whether that is enough depends on what the building requires. If a facility standard, an accessibility review, or an insurer calls for a defined slip-resistant leading edge, specify the abrasive inserts in 3/4 inch or 2 inch and get it in writing before the order. Inserts are molded in, not added later, so this is a decision made once at specification and not revisited.
How does it install, and what does the step underneath need to look like?
Answered by Dustin Thompson, Owner & CEO
Strip the old covering completely and get the adhesive residue off. A one-piece part follows the step it sits on, so a ridge of old mastic or a lifted patch of the previous tread will telegraph straight through the finished surface. Fill chips and low spots, and let any patching material cure fully.
Pieces are cut to length on site and set in adhesive across the full tread and riser face, worked from the nose backward so air moves out rather than getting trapped at the seam-free rear edge. Let the cartons acclimate to room temperature first. Keep traffic off until the adhesive has set, which usually means doing a stairwell in halves so the building still has a route.
What do the colors look like, and how do I choose for a stairwell?
Answered by Jinna Hopson, Vice President of Marketing
Twenty-five colors, eleven solid and fourteen marbleized. The solids cover neutrals like dust, mid gray and putty gray through to charcoal, onyx and deeper tones including wine and pine. They give a clean, even surface where the disc pattern is the only visual texture.
For a working stairwell the marbleized range is usually the better answer. Swirled tones such as charcoal, chestnut and mid grey break up the surface so scuffs, tracked grit and the polish that develops in the main walking path fold into the pattern instead of standing out. A flat solid in a busy stairwell shows every mark until the next deep clean.
Does it have to match the landing at the bottom?
Answered by Jinna Hopson, Vice President of Marketing
It does not have to, but a stairwell reads as finished when the steps and the landing agree. A raised disc landing tile shares the same profile and the same color range, so the pattern carries straight off the bottom step onto the floor without a visual break.
If you would rather mark the change in level, contrast deliberately. A darker landing under lighter steps, or the reverse, tells anyone glancing down where the flight ends, which is genuinely useful in a dim stairwell. What looks wrong is the near-match, where the landing almost agrees with the treads but not quite. Commit to one or the other.
What lengths does it come in, and how do I work out an order?
Answered by Jinna Hopson, Vice President of Marketing
Lengths run from 36 to 108 inches, and pieces ship six to a carton at 2.5 pounds per linear foot. Measure the widest step in the flight rather than assuming they are identical, order to that, and trim down on site. Most commercial stairs fall comfortably inside the range without needing a joint mid-step.
Count the steps, add one spare piece, and order the whole stairwell together. Colors run in batches, so a replacement bought later may not sit invisibly next to its neighbors, and a single damaged step is a routine event over a stairwell's life. The spare turns that into a swap instead of a conversation about redoing the flight.
By Dustin Thompson, Owner & CEO, Mats Inc.